Travis continuous integration
Travis CI is a hosted continuous integration and deployment system linked to GitHub. https://docs.travis-ci.com/user/for-beginners
It has been enabled and configured for the Indicia warehouse so that, everytime a commit is made to the repository, a server is created, the warehouse software is installed, and the PHPUnit tests are run. It will confirm that the installation process still works and that all the tests still pass. The committer will receive an email if the tests fail. This typically arrives after a few minutes. The email contains links which you can follow to see details of the test runs on the Travis website. The test can be run against multiple versions of PHP to ensure compatibility across versions. At time of writing tests are run against PHP 5.4, 5.5, 5.6 and 7.0 but this will change over time.
The top level results of a test run look like the following.
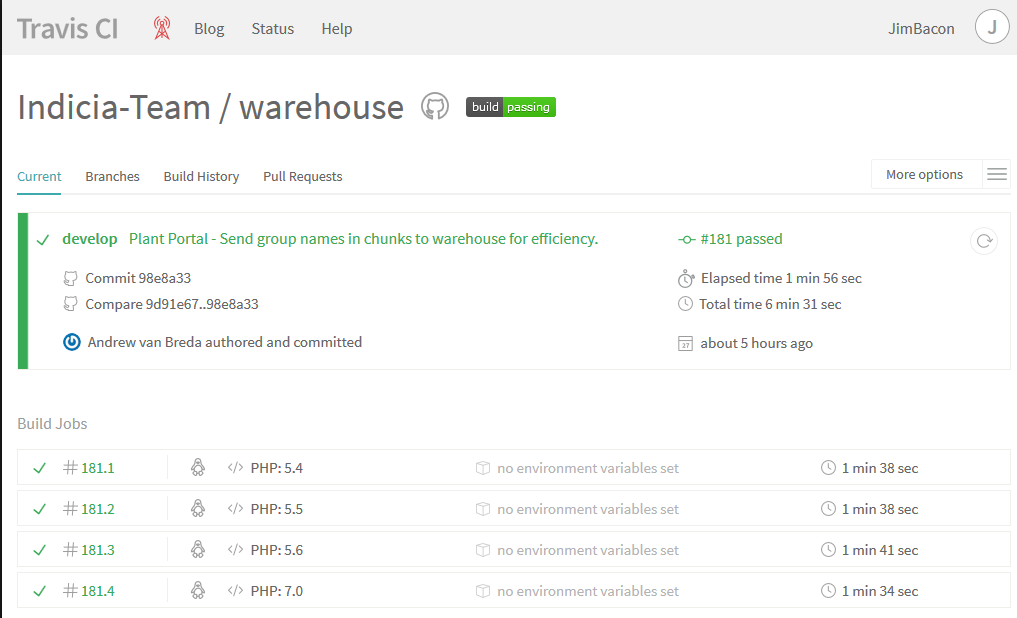
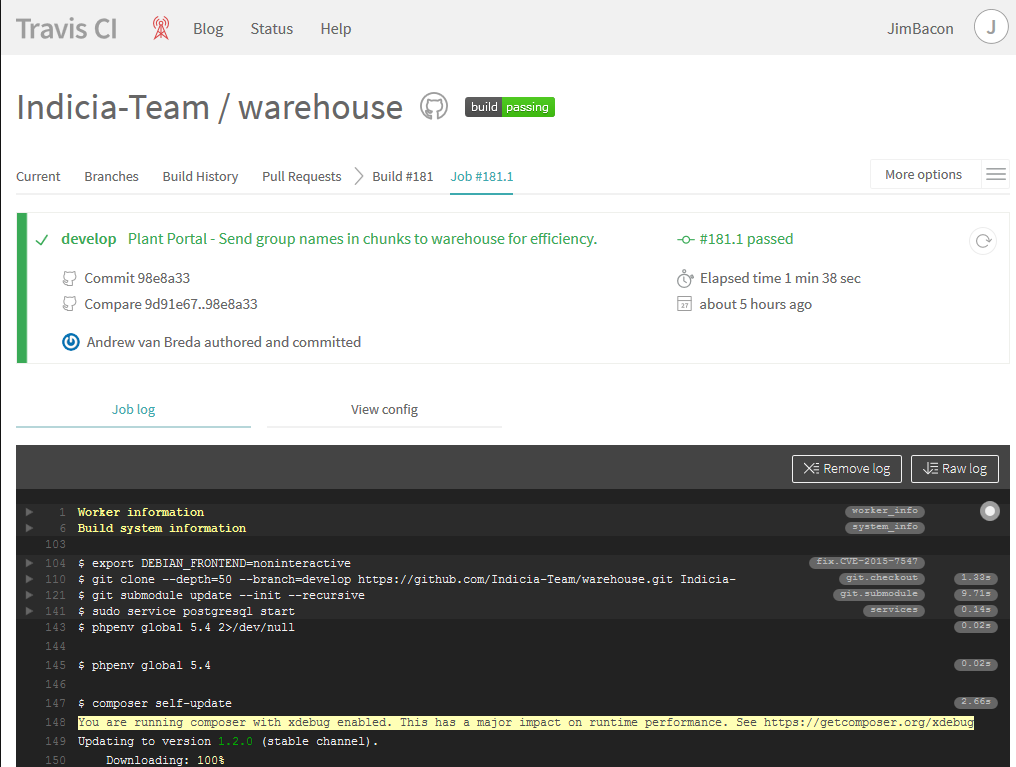
This shows that the overall test passed, the commit that prompted the tests, the total time taken, and the results of each of the build jobs with the different versions of PHP. Clicking on one of the rows in the list of build jobs reveals a log of the commands executed and the results of each individual test, as shown below.
The configuration of the Travis environment is contained within the repository, principally in the .travis.yml file in the root folder. If you are a developer and you have created a new warehouse module with corresponding tests then you will need to edit this file to add your tests in to the script: section. You will also need to ensure your module is enabled when Travis is running the tests by adding it to application/config/config.php.travis. This is copied to config.php in the before_script: section of .travis.yml. If your module also needs a config file in place to run then you can copy one in the before_script: section too.
In .travis.yml, the last instruction in the after_script section outputs the contents of the warehouse log. You can add log messages to your tests as well as to your code and review the output after the tests have run. This can be very helpful when debugging. To view the indicia log, scroll to the bottom of the Travis log and click on the line which reads $ cat application/logs/*
When writing tests you will be following the guidelines in https://phpunit.de/manual/current/en/writing-tests-for-phpunit.html. Look at the tests in modules/phpUnit/tests for some examples created by the developers of Kohana.
However, once your tests require interaction with the indicia database things become a fair bit more complicated. The content of the database has to be setup for each test as described in https://phpunit.de/manual/current/en/database.html. Fortunately much is already in place to simplify this. Your test class should
Extend the class Indicia_DatabaseTestCase. This handles all database connections using the credentials stored in modules/phpUnit/config/database.php. You should ensure the credentials are consistent with your database configuration.
Add a getDataSet() function which should load and return, as a minimum, the core fixture. This sets up a default website, survey, sample, occurrence, taxon list, cache tables and more in a consistent fashion.
Optionally add more data to the database fixture in getDataSet() to serve the needs of your particular test. This is easily done in code using an instance of the Indicia_ArrayDataSet class.
Add a setUp() function which should call parent::setUp() as a minimum. The setUp function is called before each test method is executed and the parent function establishes the database in the state defined by the getDataSet() function.
For example
class MyModuleTest extends Indicia_DatabaseTestCase {

  public function getDataSet()
  {
    // Load the core database fixture
    $ds1 =  new PHPUnit_Extensions_Database_DataSet_YamlDataSet('modules/phpUnit/config/core_fixture.yaml');

    // Add database tables for my module.
    // The top level array contains an entry for each table with index of table name.
    // The next level is an array of rows in the table.
    // The third level is an array indexed by field name, containing the field value.
    // Primary key id values can be omitted where they are generated by sequences.
    $ds2 = new Indicia_ArrayDataSet(
      array(
        'my_table_name' => array(
          array(
            'title' => 'my title',
            'description' => 'my description',
            'created_on' => '2016-07-22:16:00:00',
            'created_by_id' => 1,
            'updated_on' => '2016-07-22:16:00:00',
            'updated_by_id' => 1,
          ),
        ),
      ),
    );

    // Combine the two datasets.
    $compositeDs = new PHPUnit_Extensions_Database_DataSet_CompositeDataSet();
    $compositeDs->addDataSet($ds1);
    $compositeDs->addDataSet($ds2);
    return $compositeDs;
  }

  protected function setUp() {
    // Calling parent::setUp() will build the database fixture.
    parent::setUp();
  }

  public function testMyMethod() {
    // Your test and assertions.
  }
}
Note
When PHPUnit sets up the database fixture it begins by truncating the existing tables to get them in a known state. If your database contains information you value, back it up!