Adding an IForm node
Now, go to your Drupal site and log in as administrator. On the admin menu, select Content > Add content > Indicia pages (Content management > Create content > Indicia forms in Drupal 6) to access the page used to add and configure an Indicia form. Set the following options:
Set Page title to “Add tutorial record”.
Expand the Menu settings section and set the Menu link title to Add tutorial record. This simply adds the form to the site’s main menu and makes it easier to find again if we navigate away.
Scroll down the page a bit and find the Form selection section. This is where all the Indicia configuration will take place - the other settings on the page are just standard Drupal page settings.

Set the Select Form Category drop down to the category you gave your form, probably “General Purpose Data Entry Forms”, then select the “Tutorial” form in the Select Form drop down. You should see that the description you gave your form has appeared on the screen, useful to let website builders know exactly what they are getting before they go through the rigmarole of setting up all the configuration required.
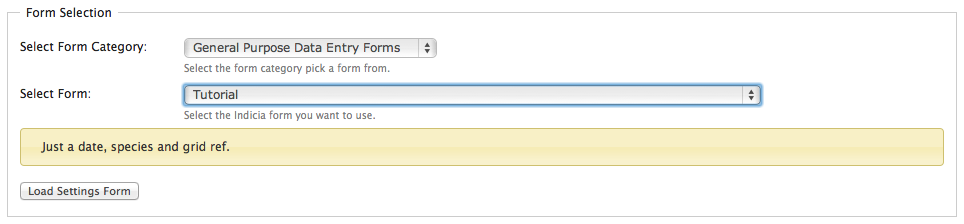
Click the Load Settings Form button. This sends a request to the web-server
to get the parameters required for configuring this type of form. As we did not
return any parameters in the get_parameters method, the ones you see here
are just a few default ones to do with things like permissions. You can leave
the default settings and just click the Save button at the bottom of the page.
Hopefully, you will see the title of the page, Drupal’s View, Edit tabs, a
message informing you that the form has been saved and with a bit of luck,
the message you returned from the get_form method:

Tip
In this screenshot, I’ve got the Node Clone module installed. This is a really handy module for copying form definitions to create new, similar forms.